Google shipped Flow as the official environment to compose video with Veo, its AI video generation model. The UI is solid, but running 30 prompts in a row means opening the project, pasting, waiting, downloading, going back, repeating. This guide walks through how to automate batch sending and download via a Chrome extension — no scripts, no API contracts.
📌 Key takeaways
- Flow AutoKuak automates batch prompt sending to Google Flow (Veo 3.1 / Nano Banana Pro) — no scripts, no API contract.
- Hybrid pattern: pick Veo 3.1 for video, Nano Banana Pro for image iteration.
- Each generated file is downloaded inline during the batch with the configured delay and renaming pattern.
- Free plan: 30 items per run. Pro removes the per-run cap. Use a small range first to validate cost before scaling.
What Google Flow is and why batch automation changes the workflow
Flow is the suite Google built at labs.google/flow to create and edit video with its generative models. The centerpiece is Veo 3.1, producing multi-second clips from text or image-plus-text. Flow also bundles Nano Banana Pro for image iteration and a shot composer that organizes clips in sequence.
The bottleneck, exactly like with Grok, isn’t the model — it’s the UI. Veo takes anywhere from 30 seconds to two minutes per clip depending on the model. With 30 ideas in hand, that’s 30 manual paste-wait-download cycles. Multiply across a production week and the friction gets real. The good news: Flow exposes the selectors a Chrome extension needs to orchestrate the process — no scraping, no paid API contracts.
Veo 3.1 vs Nano Banana Pro: pick before you start
Decide which model you’ll run before configuring automation. Flow AutoKuak respects whichever model is active in Flow’s own dropdown; the two user-selectable options that matter for batch work are Veo 3.1 (video) and Nano Banana Pro (image). The choice changes the realistic timer and how many outputs you can generate per session.
| Model | Output | Average time per item | When to use it |
|---|---|---|---|
| Veo 3.1 | Video clip | ~90–120 s | Hero shots, B-roll, pillar video content |
| Nano Banana Pro | Image | ~10–20 s | Reference frames, thumbnails, storyboards, image iteration |
Practical rule: iterate visuals with Nano Banana Pro (10 reference frames in 2 minutes) and only when the look locks in, generate the final video pass with Veo 3.1. This cuts real cost (Flow credits aren’t unlimited) and leverages batch automation to push many quick iterations in parallel.
What you need to automate Flow
- A Google account with Flow access. Today Flow is reachable at labs.google/flow or, in some enterprise deployments, at veo.genaipro.vn. Flow AutoKuak works on both.
- You must be inside a Flow project. Having Flow open on the landing isn’t enough — you need to enter a specific project where videos are generated. The extension throws an overlay if you’re outside the right context.
- A structured prompt source. Google Doc, Notion, web page, or local .txt. What matters is consistent delimiters between prompts.
- AutoKuak Suite installed. The Flow AutoKuak module ships in the Free plan with a 30-item-per-run cap. Pro plan: unlimited prompts on Pro with no per-run cap.
If you’ve already configured Grok AutoKuak in the past, the learning curve here is minimal — delimiters, range, timers all work the same. The differences are the selectors and the Veo model picker, covered below.
Flow AutoKuak setup, step by step
Step 1 — Install Flow AutoKuak and enter Flow
Add Flow AutoKuak from the Chrome Web Store. Once installed, open labs.google/flow and enter a project where videos are generated. If the extension detects you’re outside a project, it’ll show a warning and disable Start until you’re in the right place.
Step 2 — Open your prompt source
Two tabs: the Flow project and your prompt source. If your source is a Google Doc, open it in another tab. If you have prompts pasted into a textarea by hand, that’s fine too — Flow AutoKuak takes both external sources and manual input.
Use the “Choose” button on the module to bind each tab: one is the prompt source (textarea, Google Doc, web), the other is the active Flow tab where prompts get sent.
Step 3 — Define delimiters
Delimiters are the markers that say where each prompt starts and ends in your source. Three patterns that work well with Veo:
- Separator lines like
===between prompts. Paste the delimiter in START and in END. - Explicit numbering: each prompt opens with
SHOT 01:and closes with a double newline. - Markdown code blocks if your source is a structured Doc: triple backticks as start and end.
Hit “Scan” so the extension reports how many fragments it found. If the count is off (12 when you expected 30), fix delimiters before you launch anything.
Step 4 — Configure timers and pick the model
The “Time between messages” field uses preset values: 5, 10, 20, 30 or 60 seconds, with 5 as the minimum. For Veo 3.1 you’ll want the higher end (30 or 60) so each video has time to render before the next prompt fires. For Nano Banana Pro, 10 seconds is usually enough.
Pick the model (Veo 3.1 or Nano Banana Pro) from Flow’s own dropdown before you start. Flow AutoKuak respects whichever model is active in the UI; it doesn’t switch for you. If you want to iterate frames in Nano Banana Pro and then animate them with Veo 3.1, those are two separate runs.
Step 5 — Validate with a small range first
Rule number one when you’re working with Veo. Each generation has a real cost (Flow credits); a misconfigured batch eats 30 credits producing garbage. Use the range selector to launch only the first 1–2 prompts as a test pass. If the outputs look right, expand the range and run the rest. The Scan button also shows how many fragments the delimiters captured — a quick way to spot a parsing problem before you hit Start.
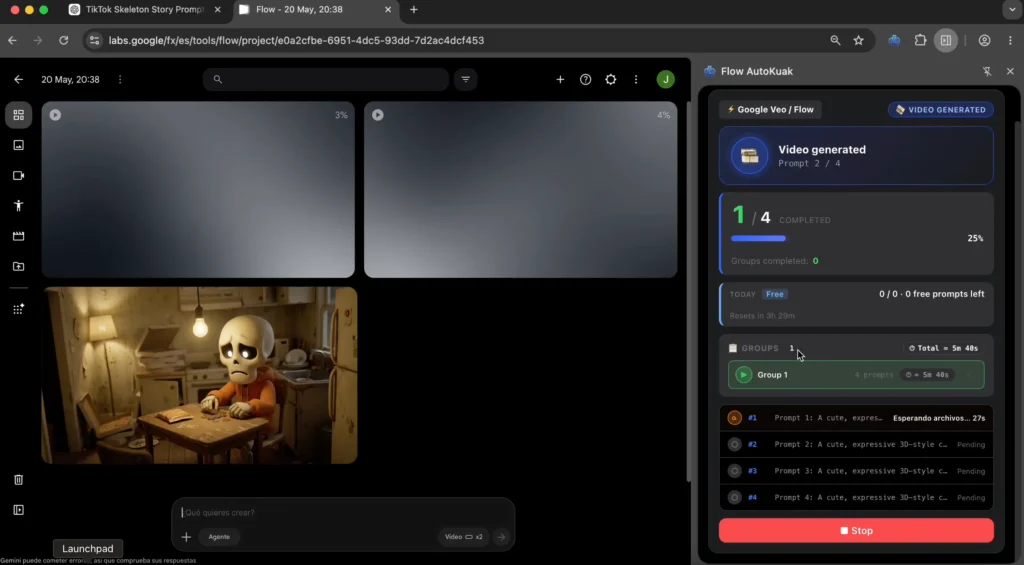
Step 6 — Launch and let it run
Hit “▶ Start”. The side panel shows which prompt is processing, how many are done, how long each took, and which files have been downloaded. The Flow tab must stay open — the extension operates on the live DOM. If you need to abort, hit Stop: outputs already saved to disk are kept, and you can relaunch a smaller range later for the remaining prompts.
Common Flow AutoKuak mistakes (and how to avoid them)
- Launching outside a project. Flow has a landing and individual projects. The extension only operates inside a project. If Start is disabled with “Open a Flow project”, enter the project and retry.
- Setting the timer too low for the model. Veo 3.1 needs roughly 90–120 seconds per clip; if your “Time between messages” is at 5 or 10 seconds, Flow keeps receiving prompts mid-render and outputs get queued or dropped. Pick a preset (30 or 60) that matches the longest realistic render time.
- Switching models mid-batch. Changing the model in Flow’s dropdown after starting means later items render with a different model. If you need different models per section, split the batch into separate blocks.
- Forgetting Flow credits. The extension orchestrates sends and downloads, but credits are billed by Google Flow per its policy. Before running 50 generations, check your remaining credits.
- Trusting an unstable connection. The extension runs in your real browser; if Wi-Fi drops mid-batch, timers don’t pause for you. Hit Stop, check what’s already on disk, and relaunch a smaller range for the remaining prompts.
Flow AutoKuak vs Grok AutoKuak: which one?
Both modules live inside AutoKuak Suite and share logic (delimiters, range, timer presets, inline downloads, Stop). The pick depends on which model your channel runs on:
| Criterion | Grok AutoKuak | Flow AutoKuak |
|---|---|---|
| Model | Grok Imagine 1.0 | Veo 3.1 (video) / Nano Banana Pro (image) |
| Average time per item | ~30–60 s | ~10–120 s by model |
| Cost per generation | Variable X premium quota | Google Flow credits |
| Typical quality | Strong for shorts and visual narrative | Excellent for cinematic realism |
| Recommended use | High volume, fast iteration | Pillar content, hero shots |
The strategy serious creators are settling on is hybrid: Grok to iterate prompts at high speed, Veo to render what actually ships. For the Grok side in detail, see the Grok AutoKuak step-by-step guide; for downloading whatever you generate (Grok or Flow), the Downloads module guide applies with minimal changes.
💡 Want to automate Veo on your next project? Flow AutoKuak Free, install in under a minute.
Real use cases for Flow AutoKuak
Producing 20 hero shots for a YouTube series
You have a 20-video series and need cinematic B-roll for the first 5 seconds of each. Instead of generating one by one, write 20 prompts in a Doc, launch Flow AutoKuak with Veo 3.1, and come back two hours later to all 20 clips ready in your folder. If the first one’s mediocre, iterate just that one and replace the file on disk.
A/B testing of visual hooks
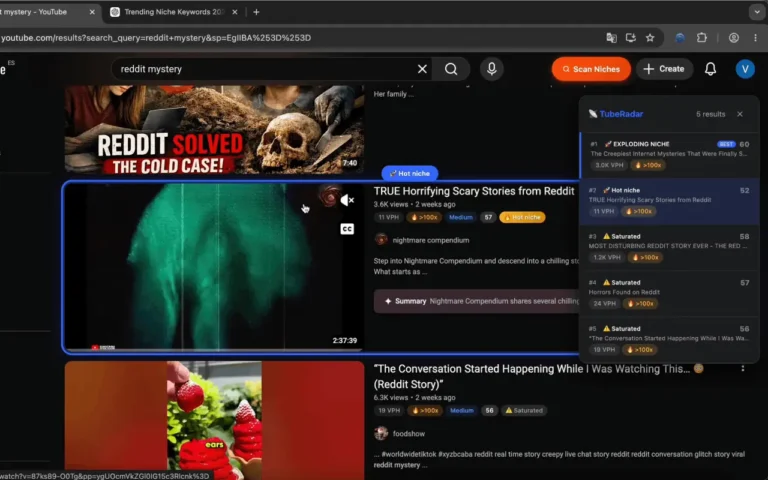
You have an idea for a Short but want to see three opening-shot variations before committing. Write the 3 variant prompts, launch with Nano Banana Pro to lock the look fast, then promote the winner to Veo 3.1 for the final animated pass. The AutoKuak Suite overview shows how this dovetails with the rest: once you find the winning hook variant, you can validate it against trending hooks in your niche via TubeKRadar.
Generating B-roll for faceless channels
If your channel is faceless with voiceover, Veo is probably the main visual tool in your pipeline. Combining Flow AutoKuak + Downloads + an editor (DaVinci, CapCut, Premiere) covers 80% of the workflow. The faceless AI channel guide walks through the full pipeline.
Free vs Pro for Flow AutoKuak
Free includes Flow AutoKuak with a 30-item-per-run cap. More than enough if you work in small batches and want to validate the workflow before paying anything. Pro removes that cap and gives you unlimited prompts on Pro. Card via Stripe Checkout; the customer portal lets you change plans or cancel in two clicks.
Three Pro tiers based on cadence: Pro Monthly ($9.99/mo), Pro Quarterly ($26.99/3 mo), and Pro Annual ($89.88/yr — equivalent to $7.49/mo). Compare plans →
Frequently asked questions
Does Flow AutoKuak work with the enterprise Veo deployment (veo.genaipro.vn)?
Yes. The extension supports both labs.google/flow and veo.genaipro.vn. If your org uses the enterprise Veo deployment, open the tab on that domain and the extension activates automatically.
Can I combine Flow AutoKuak with Grok AutoKuak in the same project?
Of course. Independent modules. Run a Grok batch to iterate prompts (fast and cheap), export the winners, and run them in Flow for the final render with Veo 3.1. That’s the most common hybrid pattern today.
Does the extension consume my Flow credits?
Not directly — Flow charges credits per generation its model runs. The extension just sends prompts; credits are billed by your Google account per Flow’s terms. Run a small range first (1–2 prompts) to verify cost and output quality before launching the full batch.
What happens if Google changes Flow’s UI?
When Flow modifies its DOM, we ship an extension update. The selector layer (input, Generate button, model dropdown) is isolated and can be updated independently. Keep the extension current via the Chrome Web Store.
Is there a limit on generated clip length?
Veo defines that, not the extension. Today Veo 3.1 generates multi-second clips per prompt; longer pieces get concatenated in post or use Flow’s extension flows that ship for some subscription tiers.
Can I use Flow AutoKuak without Pro?
Yes. The Free plan includes the module with a 30-item-per-run cap. If your cadence is small (validating the workflow, generating 10–20 clips a week), Free works indefinitely.
Get started: your first automated Veo batch
Flow AutoKuak ships with AutoKuak Suite and unlocks on the Free plan. With a Google Doc holding 10–20 prompts and Flow access, your first batch can be running in under 15 minutes: install, enter a project, configure delimiters, validate the count with Scan, launch a small range first, then run the rest.
If you’re still picking your tool between Veo and other AI video models, see the comparison of AI video generators. To see how Flow AutoKuak fits into a complete pipeline (idea → prompts → generation → download → publishing), the AutoKuak Suite overview connects the modules. And if your question is more strategic (“which niche even makes sense for me?”), the how to find profitable YouTube niches post is the right entry point.